Search Results
48 items found for ""
- 3D Printing Helmet Movie Prop
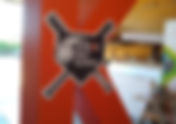
We wanted to share with you the stages and process by which we fabricated a custom 3D printed helmet, Star-Wars-like movie prop. We started out by designing the helmet using Fusion360 3D CAD program Here is the rendering of the 3D CAD software showing how the end result will look like Next step was to 3D print all parts on our 3D printer using ABS material We then glued all layers together, using Superglue, to create the unified helmet. We sanded the prop using an orbital sander as well as 400 Grit sand paper. Once done with sanding, we applied Spackle over all layers glued lines to get rid of the visible print lines, and then sanded some more In the next step, we sprayed 6 coats of filler primer. We sanded again each layer once dried to get the desired smooth finish Once the helmet was smooth enough we painted it using automotive metallic paint The last stage was to add the visor. We used a thick one that would not bend yet would still be transparent If you want to see more of our 3D printing projects and our prototyping projects, visit us at https://www.wecutfoam.com/3d-printing-foam-modeling and https://www.wecutfoam.com/cnc-prototyping #3D #3Dprinting #prop #props #prototype #prototypes #prototyping #helmet #custom #customprop #design #3Ddesign #CAD #ABS
- How to Fabricate Foam Props Figurines
Wanted to share with you the process of creating 3D foam props, small sculptures figurine characters for a customer, for demonstrating internal safety procedures at the work place. The theme was Potato Head Cocoa Beans. The customer provided us with a photo and a PDF file only, we converted the PDF to a 3D CAD file to be able to machine / mill it on our CNC router We sanded al the excess EPS material and made it smoother, then coated the Potato Head figurines with Epoxy hard coat shell and primed it. The epoxy gives it a nice protective layer and also crates a smoother finish. Next step - Painting! This is now a hard hat zone - Safety First! #props #foam #EPS #CNC #machining #figurines #sculpture #statue #potatohead #cocobean #CNCmachining
- How We Machine Architectural Topographic Models & Maps
We machine topo maps for architects, surveyors, map makers and as prototyping models, as they are an excellent planning tool and guide. A Topographic Map (Also known as Topo Map) is elevation contour lines to show the shape of the Earth surface, above or bellow a reference point (usually sea level). The contours make it possible to show geographic features such as the height and shape of mountains, depth of the ocean bottom, rivers, lakes, roads and slopes steepness. It is basically a two-dimensional representation of a three-dimensional land surface. At WeCutFoam we specialize in machining architectural topographic models and maps Photos on the top and bottom showing topo map we machined using HDU material. We used our 3-Axis CNC router and 3D CAD files to carve a three dimensional contour maps and models. We start with an STL 3D CAD File, then transport it into Rhino CAM to produce a G-Code. The CNC router translate this G-Code into movements to machine the desired shape. Different materials can be used to fabricate the topo maps, including EPS, MDF and High-Density Urethane Tooling Foam (HDU). The HDU is a great material to be used for high speed machining, allowing to portray the complex contours and shapes that the 3D map requires. Usually, no sanding is required, however, we use a dust collector to gather the foam dust particles, revealing the final map shape. The machined topo map can be poured with concrete to make for a permanent model #topomap #topographic #topographicmap #topographicmodel #architecture #architecturalshape #architecturalmodel #architecturalmap #3Dmodel #CNC #CNCmachining #CNCmilling
- What is Foam Prototyping & Foam Modeling?
A foam prototype or a foam model (also known as foam volume study), not to be confused with rapid prototyping which is 3D printing application, is a great way to show customers the product being developed, from the idea stage to the processing phase, prior to the finished product. It is a good tool since it can reveal design flaws that might not have been detected in the 3D CAD file had we went straight to production. It also gives us a realistic preview of the design scale. It is always a good idea to present the customers with a few rough foam models and prototypes, so that they can evaluate and make the changes needed to the design and/or the material used prior to fabrication of the final product. The foam prototype / model, being a foam version for whatever purpose we need, can save us a great deal of money in development and reduce the marketing time. The prototype, mostly being a 3D shape is typically CNC machined from a CAD date file on a CNC router, using materials such as EPS (Expanded Polystyrene), XPS (Extruded Polystyrene), EPP (Expanded Polypropylene), PE (Polyethylene), PU (Urethane tooling foam), Renshape, EVA, MDF, as well as plastics, acrylics, wood and aluminum light metals. Once machined, the prototype can either be left in its raw foam state or can be hard coated and/or painted as needed. If a more realistic look is required it can also be hand carved, and graphics, labels and stickers can be added Foam prototyping and modeling can be applied to a small or a regular size product, but also for large-scale ones, including vehicles, aircrafts, boats, architectural models and landscapes, topographical maps, large theme park characters, theaters and movie large props, museum exhibits, sculptures and statues. It is imperative for all manufacturing industries, especially for automotive, Aviation & Aerospace, Marine, Industrial Equipment and Medical. AND, If the model required is of a large-scale, it can be machined in pieces then glued together as a whole unit. #prototype #prototyping #foam #machining #foammodeling #CNCprototyping #EPS #XPS #EPP #urethane #toolingfoam #polyurethane #EVA #MDF #3Dprinting #foamprototype
- WeCutFoam Fabricating Pre-Production Prototypes
We are often approached by our customers to produce prototypes for them. Those companies, mostly research facilities, army affiliated companies, investors and new product designers all need to perform testing on their new product prior to production. This enables them to make the necessary design changes if needed in the process form, fit and function-wise, and make sure they have picked the right materials before committing to spend the budget on mass production. Here is an automotive headlights prototype we fabricated for our automotive design customer - machined with our CNC router, fabricated with high density Urethane foam then painted with automotive paint We machine prototypes out of HDU (High Density Urethane), MDF, XPS, EPP, EVA and other types of foam, as well as from plastics, acrylics, wood and even light metals such as aluminum. We also fabricate life-size large-scale models prototypes, cars and even aircraft parts Here are wind turbine blades prototype we were asked to create We also fabricate topographical maps prototypes for architectural companies. Here is a topo map we machined from EPS foam for City of San Francisco. It was later poured on with concrete and used as a street display. Prototyping helps in determining on the product design, the manufacturing process and the material options. To lean more visit our CNC prototyping page on our website: https://www.wecutfoam.com/cnc-prototyping #prototype #prototyping #foam #machining #router #milling #production #EPS #XPS #EPP #EVA #MDF #Urethane
- How We Fabricated 8ft tall Hashtags Props for Twitter #OneTeam
We were honored to fabricate large scale, oversize hashtags for Twitter OneTeam Annual Summit in Houston, TX. We started out by cutting each hashtag from EPS foam, using our CNC hot wire foam cutters. Since they was larger than the foam block, we cut it in 2 sections and glued them together to form the hashtag. We then cut 1/2" plywood to fit and glued it on the foam. The plywood serves as a base for placing the decor and lights on top. We created 4 different hashtags - One with gradient vinyl print, one with Marquee lights all around, another with acrylic mirrors with LED strips and a 4th one with flags vinyl stickers and lighted bases. For the Gradient Hashtag we printed the design using our wide format vinyl printer. We then glued the adhesive vinyl onto the plywood making sure to smooth it evenly to eliminate any bubbles. For the mirror-like Hashtag we used mirror acrylic panels which we glued on the plywood then we placed pink LED strips all around the shape. The LED's are connected to electric wire and a power supply, lighting up once hooked up to the electricity. The Marquee lights hashtag we fabricated by cutting a 2.5" MDF trims placing them all around the shape, then creating holes with our CNC routers inside the trims. Those holes were made to the size of the marquee lights that we placed inside. We then covered the lights with acrylic circular protectors. We fabricated the "Space" hashtag by gluing metal-like vinyl prints covering the plywood from all sides, then gluing the flags vinyl prints on top. We place a 4'x4' rod inside the prop then attached the circular bases to it to secure them in place, then attached the LED yellow lights at the bottom to make it look like the bases are suspended in the air. This hashtag was displayed at Houston Space Center. The last phase was to cut the birds logo from Sintra, placing LED strips at the back so that they will light up as well, then gluing them onto the hashtags For more information and to see some more of our fabrications visit our Instagram page #foam #CNC #CNCmachining #CNCcutting #CNCfoamcutting #foamcutting #foamlogo #vinyl #adhesivevinyl #vinylprint #wideformatprinter #twitter #oneteam #props #customprops #largeprops #oversizeprops #logo #largelogo #oversizelogo #customlogo #plywood #vinyllogo #vinylprops #fabrication
- Fabricating Oversized over 10ft Letters and Banners for Strike Out Slavery
We were honored to fabricate large scale, oversize letters, logo and banners for Major League Baseball games, fighting against modern slavery and human trafficking - "STRIKE OUT SLAVERY". We started out by hot wire cutting three large "K" letters at over 10ft tall from 2lbs EPS foam. We created the letters in 2 sections, glued them, patched them with dry wall mud, then sanded and smoothed it to eliminate the gluing sim. We then hard coated the oversize letters with Polyurea hard coat and painted them orange For the next phase we printed the logo of the "Strike Out Slavery" on adhesive vinyl using our wide format Mutoh printer. Since the logo was wider than the letter, we glued the vinyl logo onto Sintra which we glued onto the "K" letters and screwed them on to stay in place. We had to build custom large crates with wheels to hold the large letters and protect them in transportation. Next we fabricated the banner with the same process - We cut the banner shape out of 2lbs EPS foam on our hot wire foam cutter, applied Polyurea hard coat, printed the design on adhesive vinyl, glued it on the foam then glued the vinyl logo on top. We screwed metal rods in the back on the 2 sides so the banner can be attached to a high metal structure. Here is the banner hanging up high and the Large "K" at the entrance to the football stadium For more information and to see some more of our fabrications visit our Instagram page #foam #CNC #CNCmachining #CNCcutting #CNCfoamcutting #cnchotwirefoamcutting #foamcutting #largeletters #stageletetrs #bigfoamletters #foamletters #bigletters #oversizedletters #banners #logosign #foamlogo #vinyl #adhesivevinyl #vinylprint #wideformatprinter
- Fabricating Combo 2D Vinyl Sign & 3D Prop
WeCutFoam not only added wide format printing to its services offered, but also specializes in combination of 2 dimensional printed vinyl signs and letters with 3 dimensional props. Here is a sign we made for a Community Church "Me & My Big Mouth". We started out with 2D outline of the mouth prop, and drew it in 3D using Rhino file. Using out CNC router, we machined the mouth at about 3ft wide. We applied Epoxy hard coating to it and then painted the gums and the teeth. We then printed the 2D designed sign itself on adhesive vinyl paper using out Mutoh Wide Printer and wrapped it on a foam board block. We cut a hole inside the sign to fit the teeth prop and using 5 minute epoxy we glued it to the vinyl wrapped sign (the foam prop cannot adhere to the vinyl material, therefor we had to fit it into the sign by cutting into it). We embedded eye hooks onto the back of the foam sign by gluing them to plywood pieces glued to the foam, so the whole sign can be hung from the ceiling using cables. To view more signs wrapped in adhesive vinyl designed printed paper, visit our page: https://www.wecutfoam.com/vinyl-printing #wideformatprinter #foamlogo #vinylprinting #vinylprinter #printingoverfoam #wideformatprinting #adhesivevinyl #vinyloverfoam #vinylwrap #combosignsandprops
- Vinyl Printing Over Foam Shapes
WeCutFoam, among the only to be mounting vinyl printed patterns over foam blocks and shapes. Creating vivid live projects that cannot be achieved with painting, such as gradient colors or complex patterns. Here is how we fabricated 8ft tall exclamation points props with adhesive prints wrapped all around the foam for a Trade Show. First, using our CNC Hot Wire Foam Cutter and EPS foam, we cut the desired exclamation points to 8ft tall and about 20" wide and deep. Here is how the raw cut foam looked like We then applied epoxy hard coat to the foam. This made the foam smoother, and provided protection from dings and dents. Using our Mutoh Value Jet Wide Format Printer, we printed all 6 sides on a 6 mill thick adhesive film paper. The front side had the "own it" design, the rest 5 sides were printed plain purple. Since the film paper is thick, it covered the imperfections of the foam and there was no need to smooth it after the application. We start at the top and working our way to the bottom whole removing the protective later attached to the printed adhesive paper. Typically, for printing on foam, the customer provided us the ai file or eps file of the print. In this case we were provided PDF file. We then scaled it to fit the size of the foam shape being 8ft tall. To make it seems like the top part of the exclamation point is floating on the bottom part, we glued 2 quarter inch acrylic sheets to the top and bottom parts so the look sustained in the air. To learn more about our projects and capabilities for printing on foam or fabricating letters, signs, logo, props and exhibits, visit us at www.wecutfoam.com #foam #EPS #foamcutting #CNCfoamcutting #foamletters #printingonfoam #vinylprinting #vinylprinter #wrapfoam #CNCcutting #logo #foamlogo #wideformatprinter
- How WeCutFoam Fabricated Google Play Hanging Logo
We started out by cutting the "G" letter out of high density Urenthane foam, also known as tooling foam. The letter was machined using our CNC router milling machine. We then then used Bondo Agent to fill in any cracks or scratches the material might have gad, so will be as smooth as possible. It is a body filler bumper repair putty, used mostly in the automotive industry. We sprayed the Urethane foam letter with Filler Primer spray, again materiel mostly used in automotive industry. It fills in any imperfections, so assists the Bondo in filling any cracks in the foam material. This is how the Urethane letter looks like after pasting the Bondo and spraying the filer. We then painted the letter in black as required by the logo As soon as we finished with the "G" we went on to fabricate circular foam holder. We cut EPS foam on our CNC hot wire foam cutting machine, sprayed it with Polyurea hard coat and sanded it. The last phase was to paint the holder yellow and red, then to glue the "G" at the center. We then added eye hooks so that the logo can be hanged from the ceiling. Here is a video showing the completed fabricated Logo #Google #GooglePlay #foam #letters #foamletters #fabrication #CNC #CNCmachining #CNCcutting #hotwirefoamcutting #primer #bondo #logo
- Fabricating LED Backlights Halo Effect on Foam Letters
Have you seen those lit up letters looking as if they have a halo around them and wondered how they are made? At WeCutFoam we fabricate those with EPS foam First, we cut the letter, sign or character using our CNC Hot Wire Foam Cutter. We use EPS (Expanded Polystyrene) which serves as a good base for the LED lights. We then cut another piece of foam, identical to the original shape, yet 1" smaller on each side, and we glue the smaller piece to the back of the letter. We use 5 minute Epoxy, which is a glue that will not melt the foam, unlike other types of glue out there. We cut the LED strip to the length required, then glue the strip on the 1" margins with the same 5min epoxy. The LED is glued to the back of the letter so that the light will reflect from the wall creating a halo effect. The LED lights can be to any color chosen. The LED has a cord to be plugged in the socket as well as a power supply, since the LED lights are 12V and the outlet is 110V, the power supply reduces the power. Here is a video showing the process of cutting the foam shape and placing the LED To see more of our foam cutting and machining projects, visit our website http://www.wecutfoam.com #foam #foamcutting #foamletters #EPS #illuminatedletters #illuminated #haloeffect #LED #LEDlights #foamcutter #otwire #hotwirecutter #CNC #cuttingfoam #letters
- What Do We Do With Excess EPS Foam
When we cut and machine, fabricate and create foam projects for our customers, we are left with a lot of excess foam material. What do we do with it? We Keep it Green - We Recycle! Throwing it as waste in a debris box or trash can is not an option. For the purpose of recycling the foam we carry shredders, compactors and densifiers. There used to be a misconception that foam cannot be recycled, when in fact, you can shred foam with a shredder - turning it into small beads, you can use a compactor to compact the foam into pressed logs or you can melt the foam using a densifier foam melting machine. Either one of these methods is good as long as you keep it green and do not throw away the material in the trash. They all reduce the volume of the foam by up to 98% its original size. The densifier melts the foam into a long snake-like shape, then cools down. You can then further compress and press on the melted material to reduce its volume even further. The foam shredder screen hole size will determine the size of the beads. Those beads can then be used to fill bean bags to create bags, toys, decorations and more. The compacted pressed logs can be palatalized for easy transport to the recycling center. The foam can be mixed with wood, plastics, and concrete to create new materials such as insulation bricks for construction. The Foam Nuggets (melted material) is gathered in large boxes and palatalized ready to be transported to the recycling center #EPS #foam #recycling #foamrecycling #recyclingcenter #foamshredder #foamcompactor #densifier #meltedfaom #foamnuggets #foambeads #compactedfoam #foamlogs #beanbags